From: 011netservice@gmail.com
Date: 2023-05-30
Subject: Template of Visual Studio 2022, ASP.NET Core Web App (Model-View-Controller), .NET 6.0 (Long Term Support), Individual Accounts, HTTPS.
本文網址 | 原始碼
本文記錄建立 Template of Visual Studio 2022, ASP.NET Core Web App (Model-View-Controller), .NET 6.0 (Long Term Support), Individual Accounts, HTTPS.
歡迎來信交流, 訂購軟體需求.
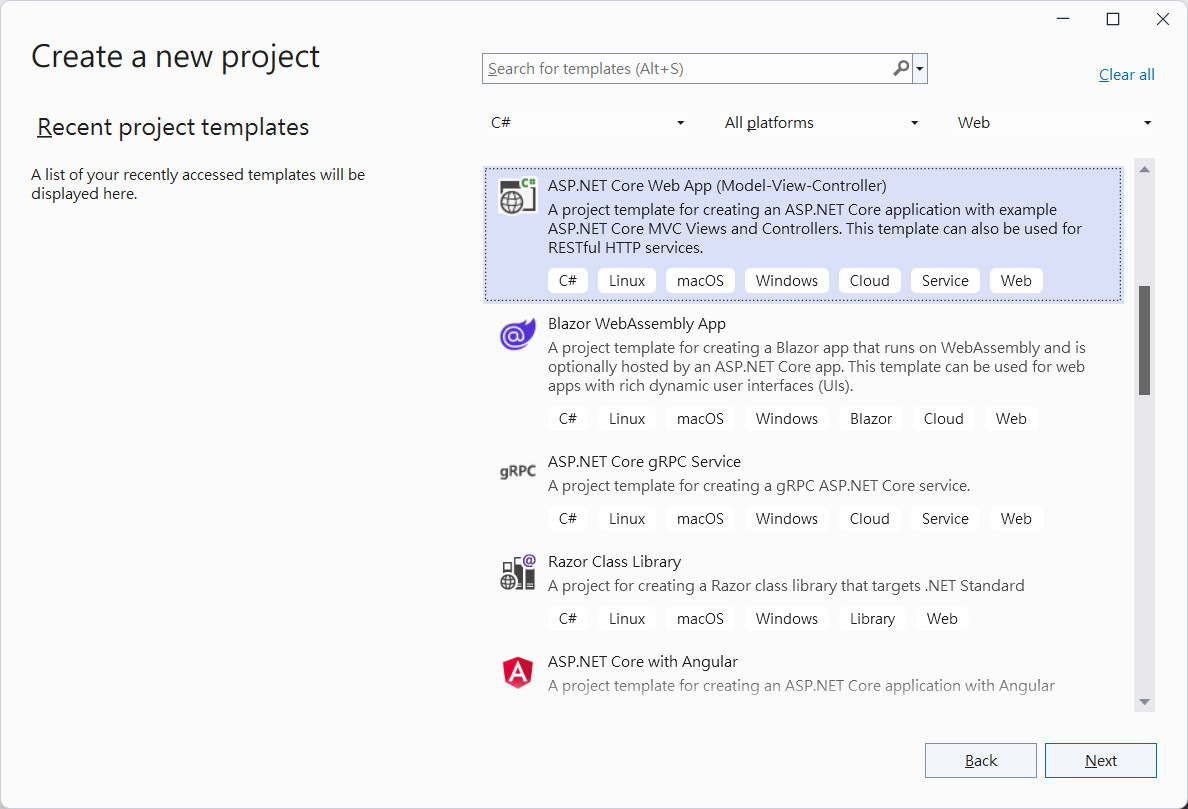
開啟 Visual Studio 2022, 選擇 Create a new project, ASP.NET Core Web App (Model-View-Controller)
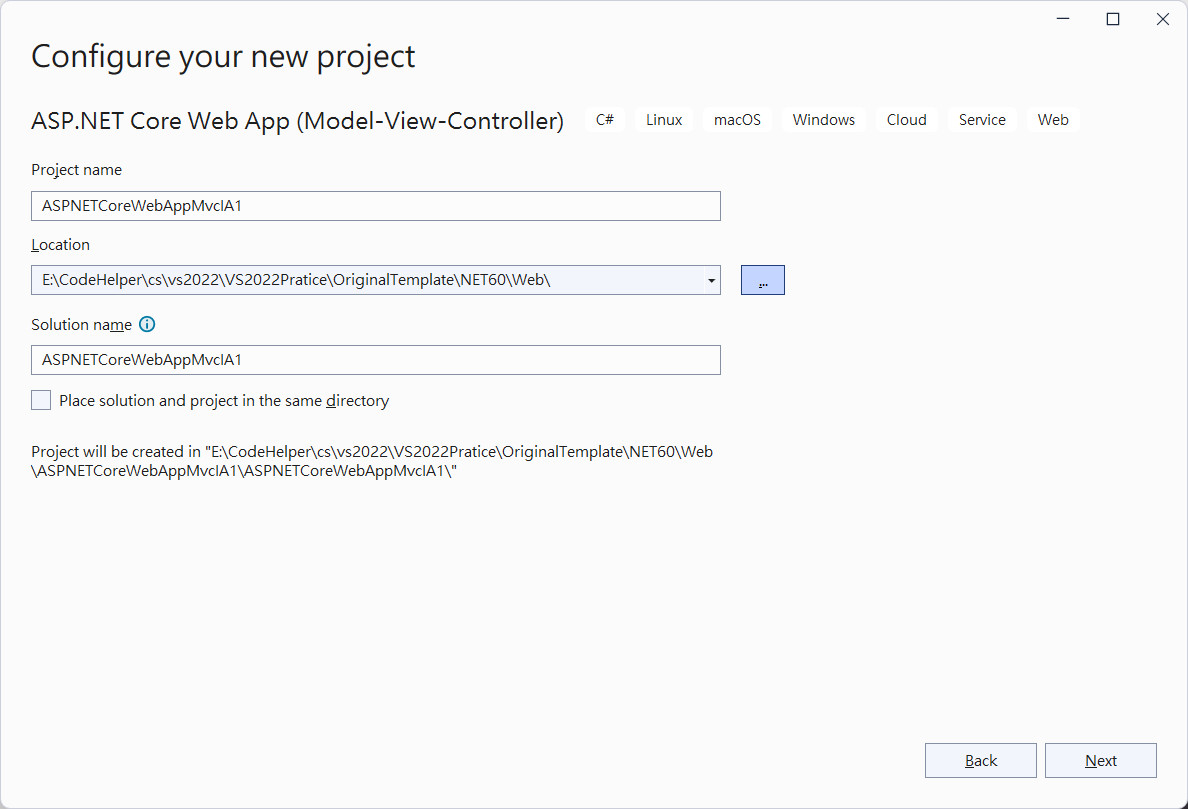
Project name="你的專案名稱", 本文專案名稱為 ASPNETCoreWebAppMvcIA1
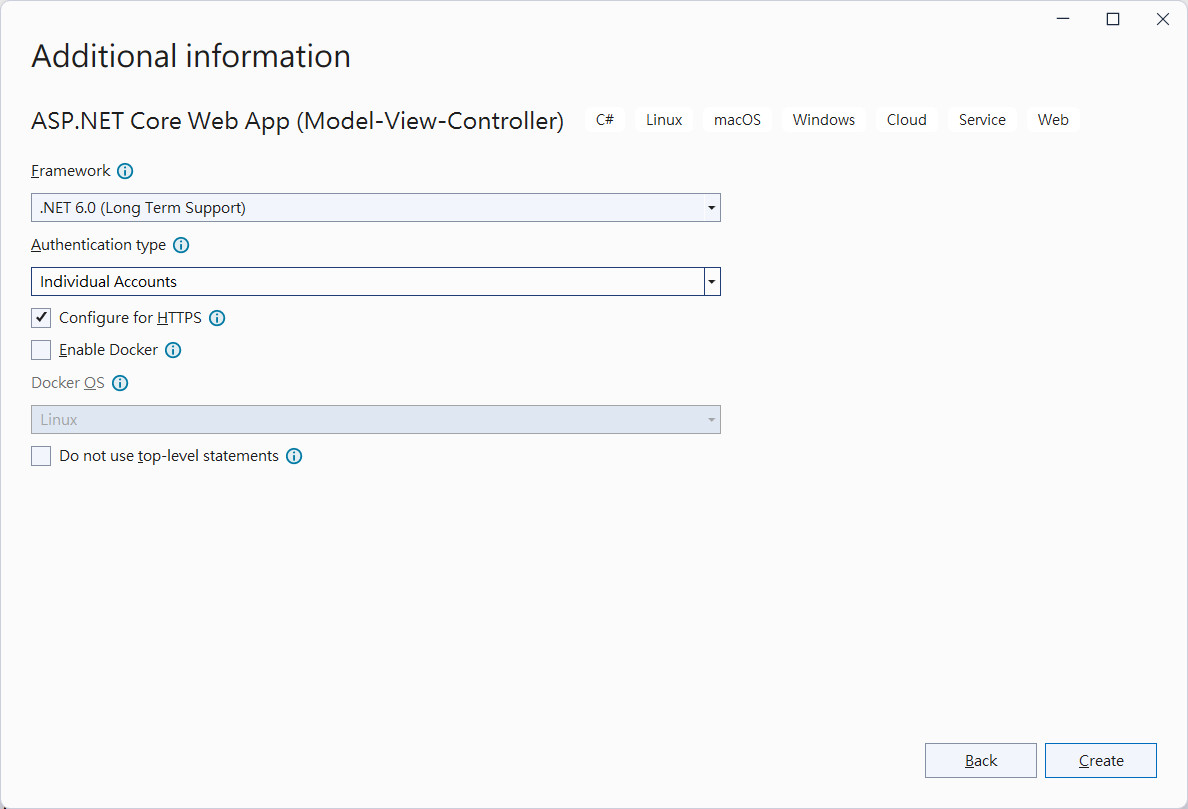
Framework=".NET 6.0 (Long Term Support)", Authentication Type="Individual Accounts", Configure for HTTPS=Checked
建立網站後如下圖.
Identity 的 Razor Page .cshtml 網頁收藏在 Microsoft.AspNetCore.Identity.UI 中.
Areas/Identity/Pages中, 只剩下 _ViewStart.cshtml, 其餘的 Razor Page 在 ASP.NET Core 2.1 都被收藏在 Microsoft.AspNetCore.Identity.UI NuGet 中.
Identity 的 Razor Page .cshtml 網頁收藏在 Microsoft.AspNetCore.Identity.UI 中.
Areas/Identity/Pages中, 只剩下 _ViewStart.cshtml, 其餘的 Razor Page 在 ASP.NET Core 2.1 都被收藏在 Microsoft.AspNetCore.Identity.UI NuGet 中.
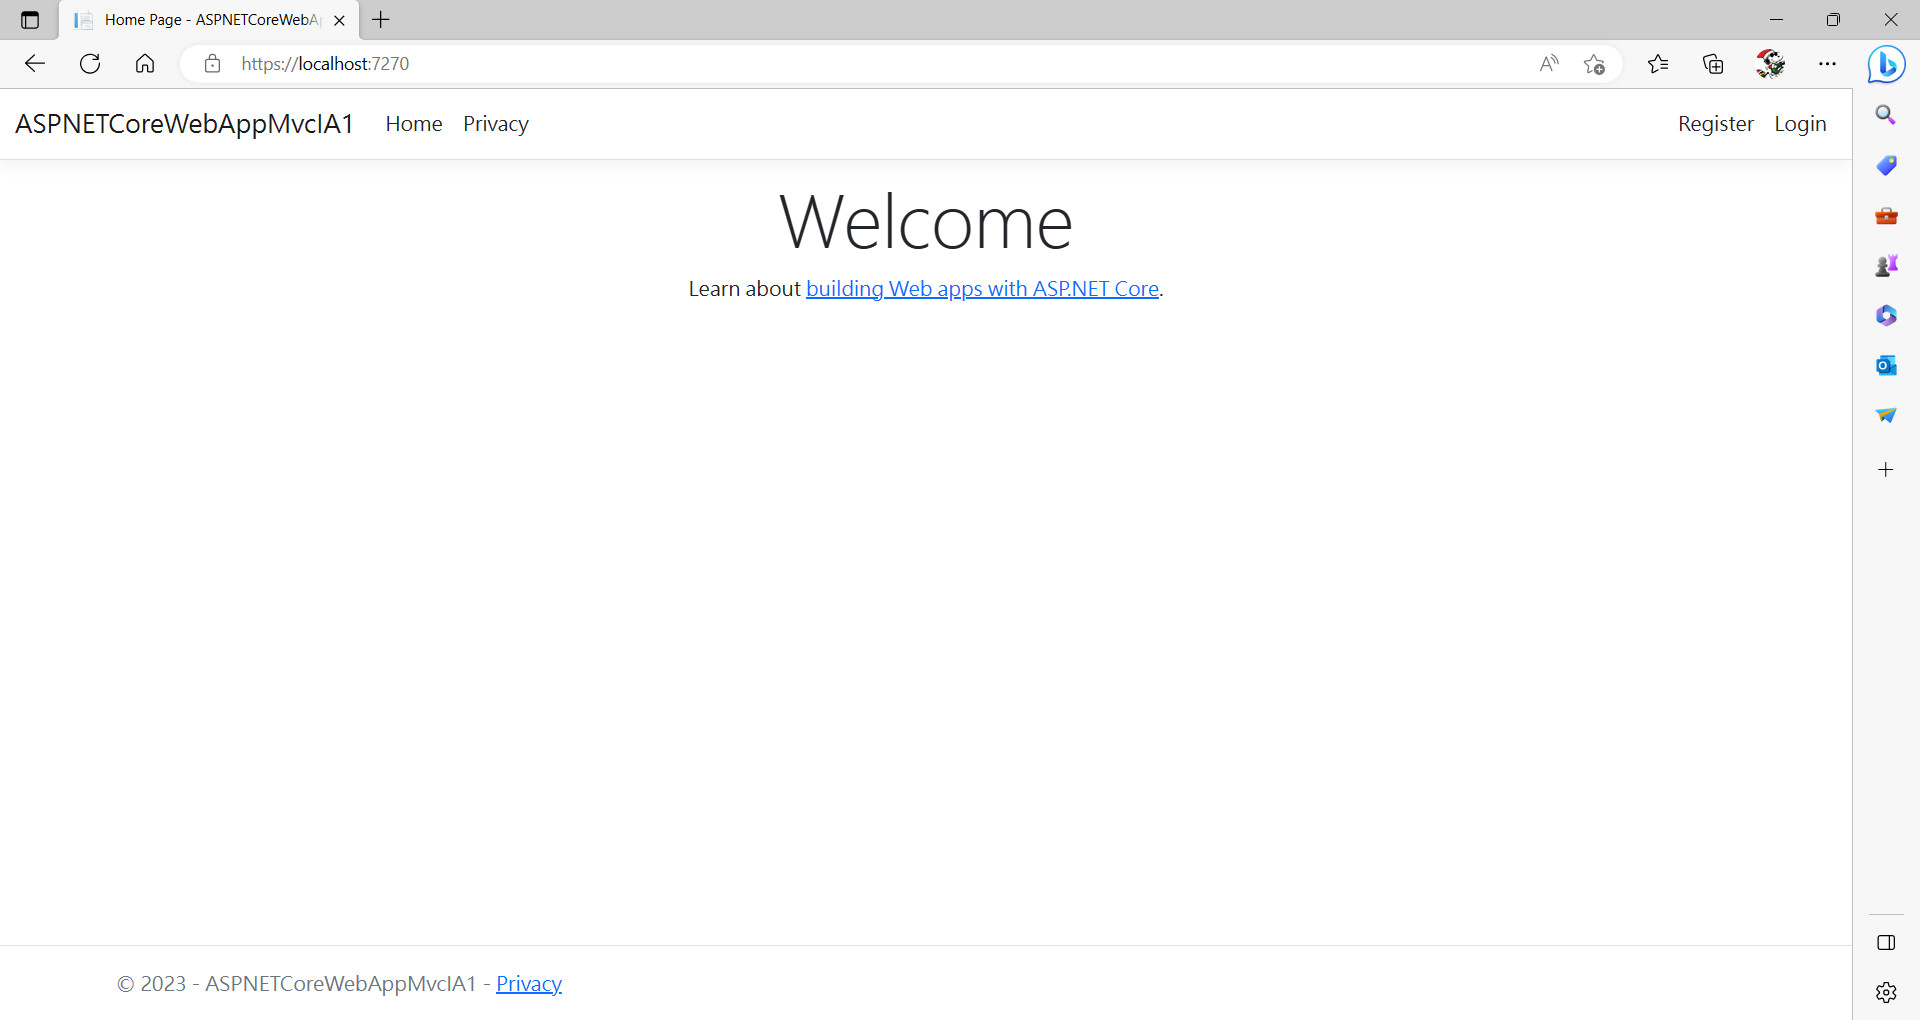
執行後首頁.

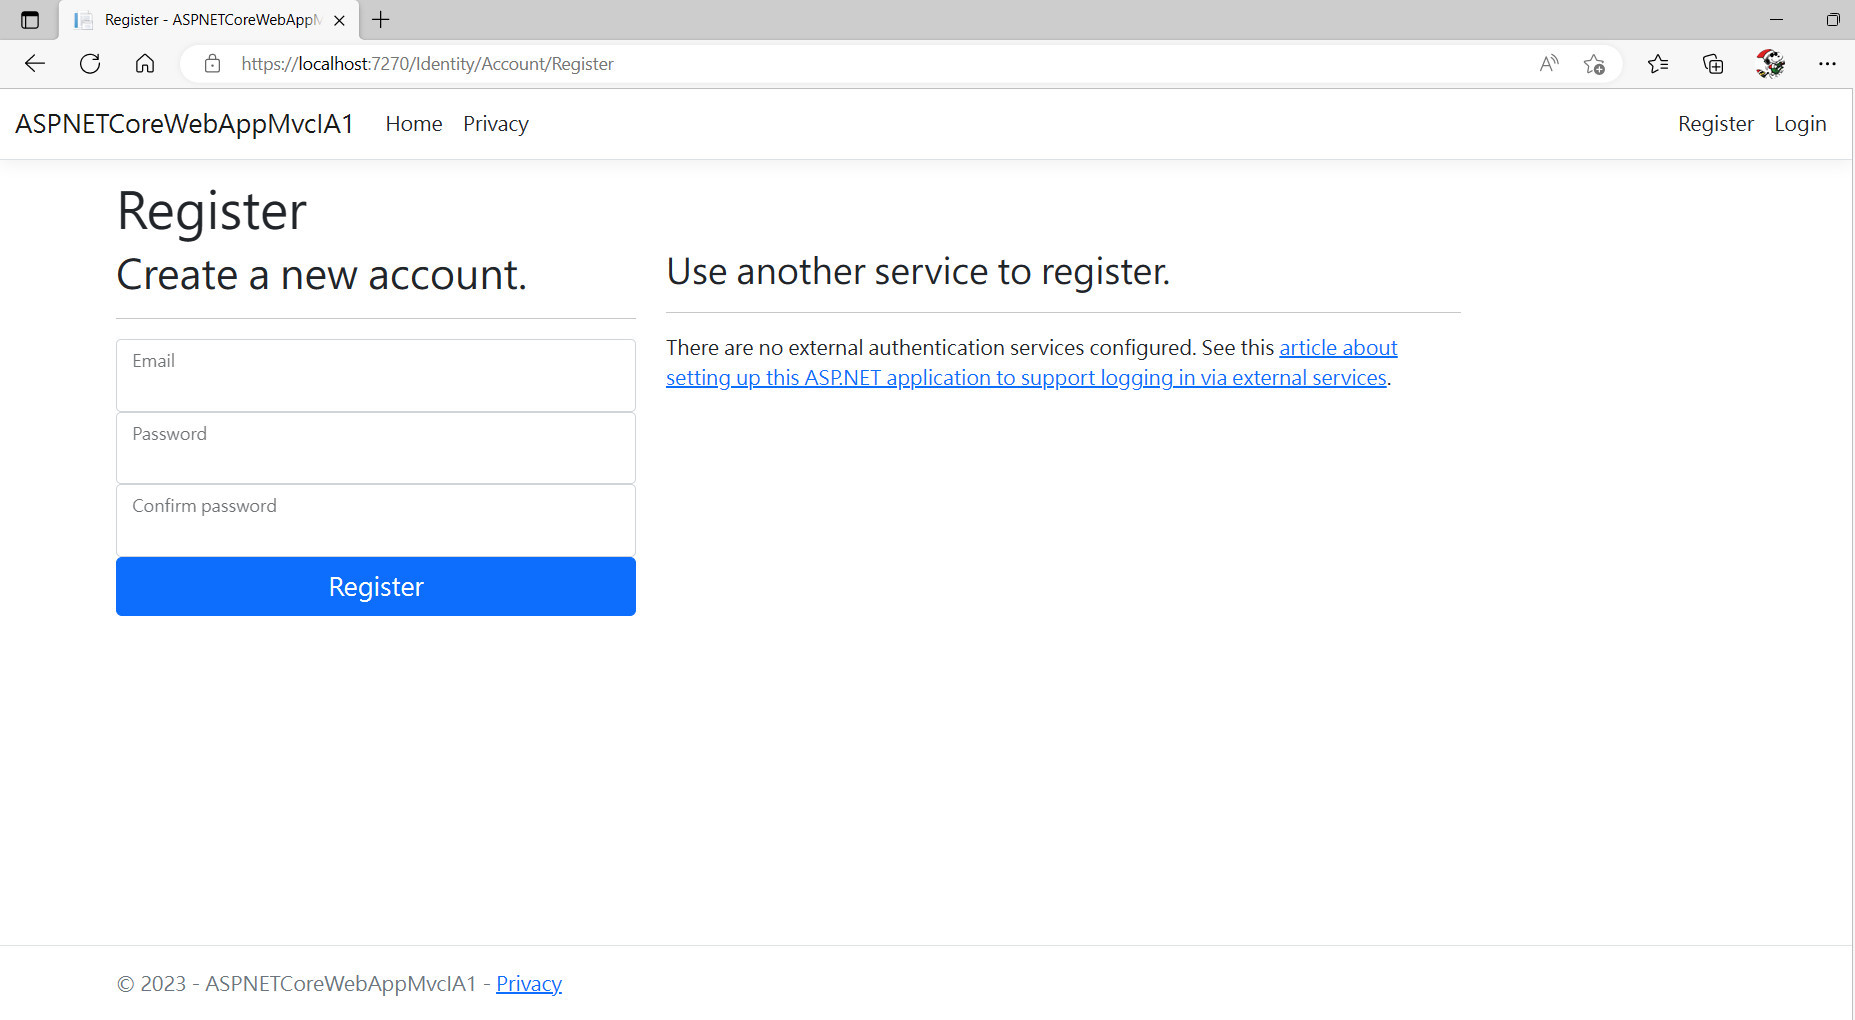
註冊使用者的頁面, 我們輸入帳號: test@test.com, 密碼: Test@Test.123註冊看看?
由於還沒執行 Database migrations, 所以會碰到 Cannot open database "aspnet-ASPNETCoreWebAppMvcIA1-b02ad989-b320-4e51-a5bc-70f7309ba7f0" 的錯誤畫面.
這個資料庫, 必須已經建立在 %userprofile% 中, 才能順利執行.
這個資料庫, 必須已經建立在 %userprofile% 中, 才能順利執行.
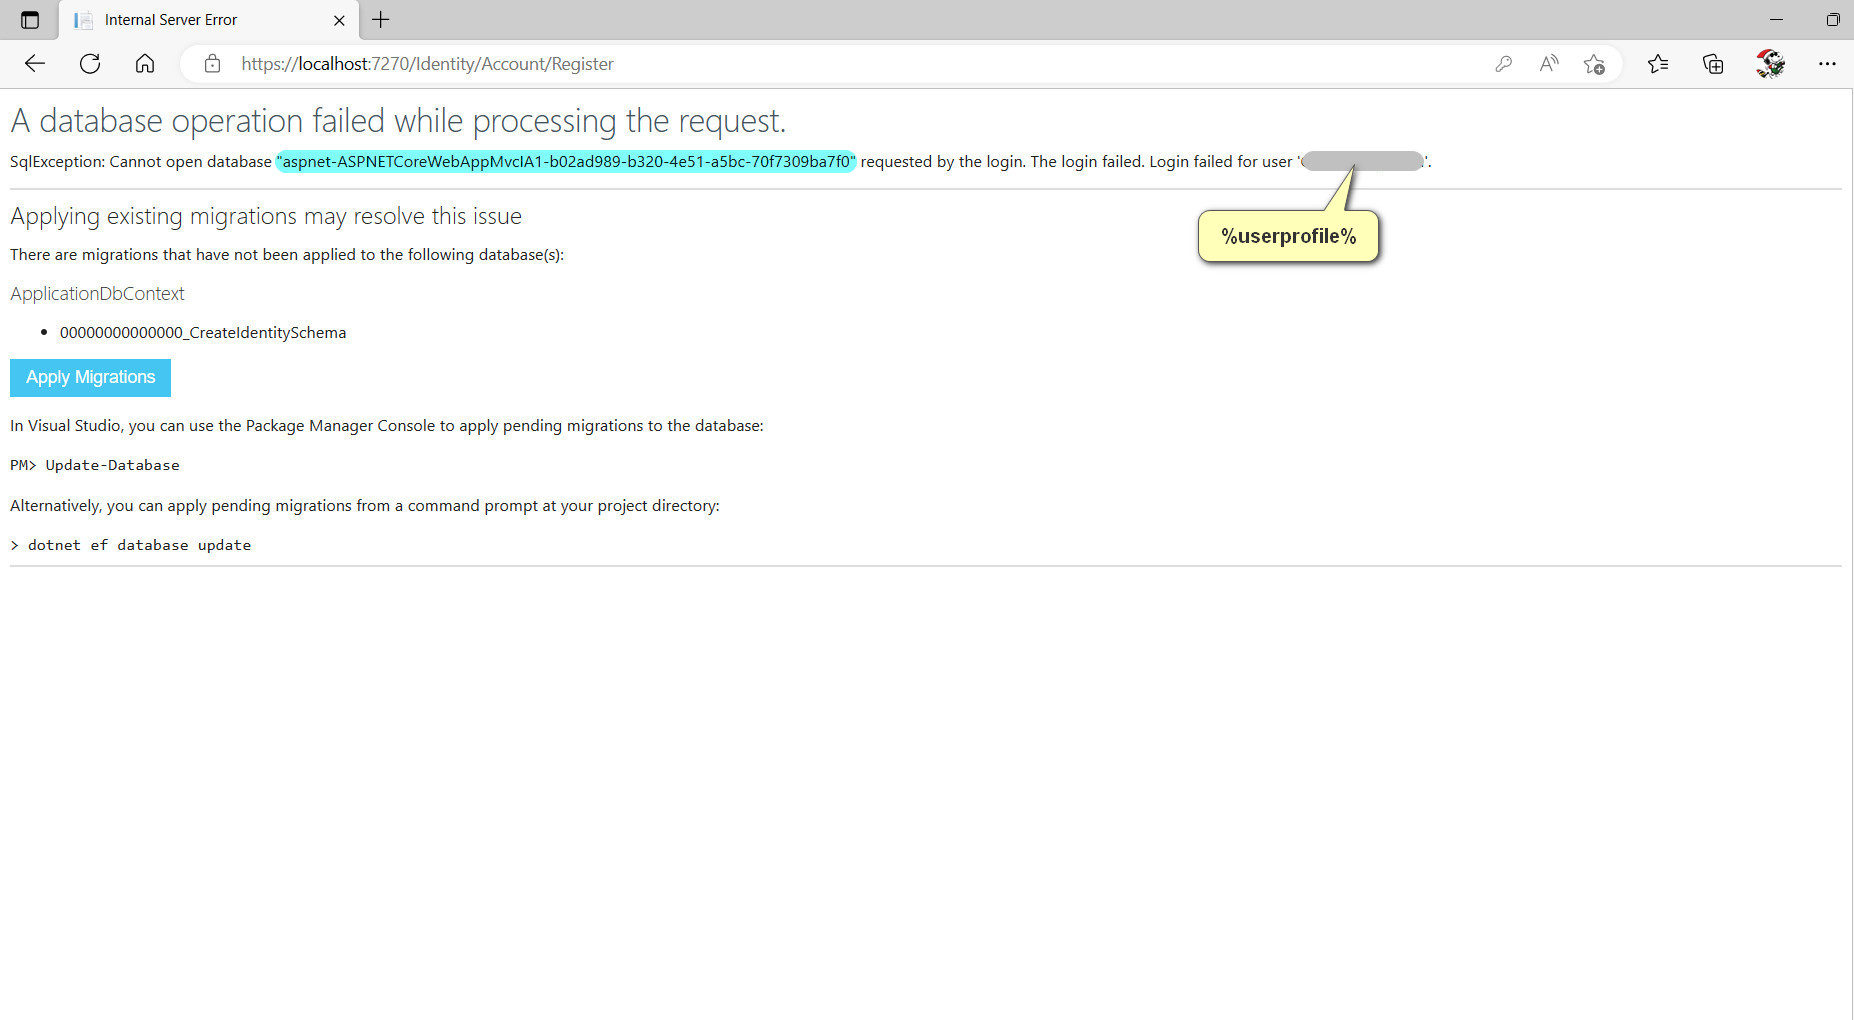
畫面上提示有三種方法可以進行 Database migrations, 建立資料庫.
若直接按畫面上的 Apply Migrations, 則通常仍會出現權限不足的錯誤訊息.
這是因為必須擁有權限, 才能將資料庫建立在 %userprofile% 中.
若直接按畫面上的 Apply Migrations, 則通常仍會出現權限不足的錯誤訊息.
這是因為必須擁有權限, 才能將資料庫建立在 %userprofile% 中.
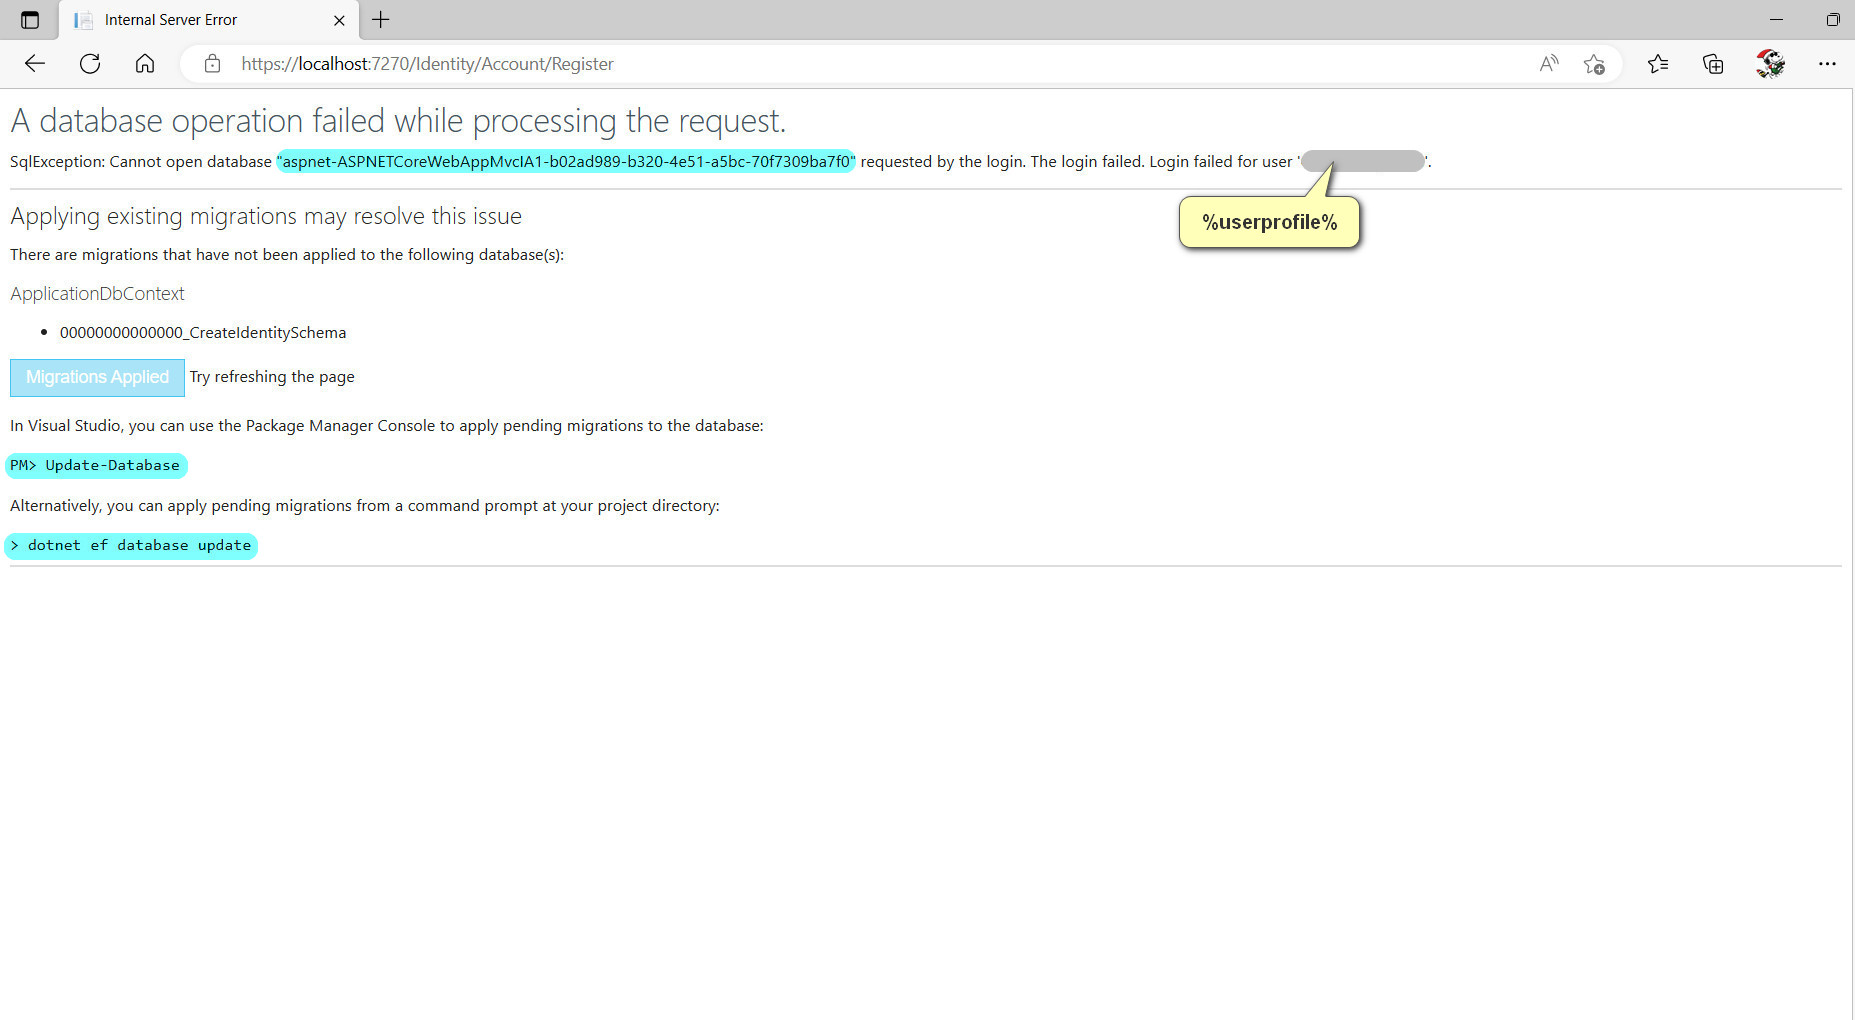
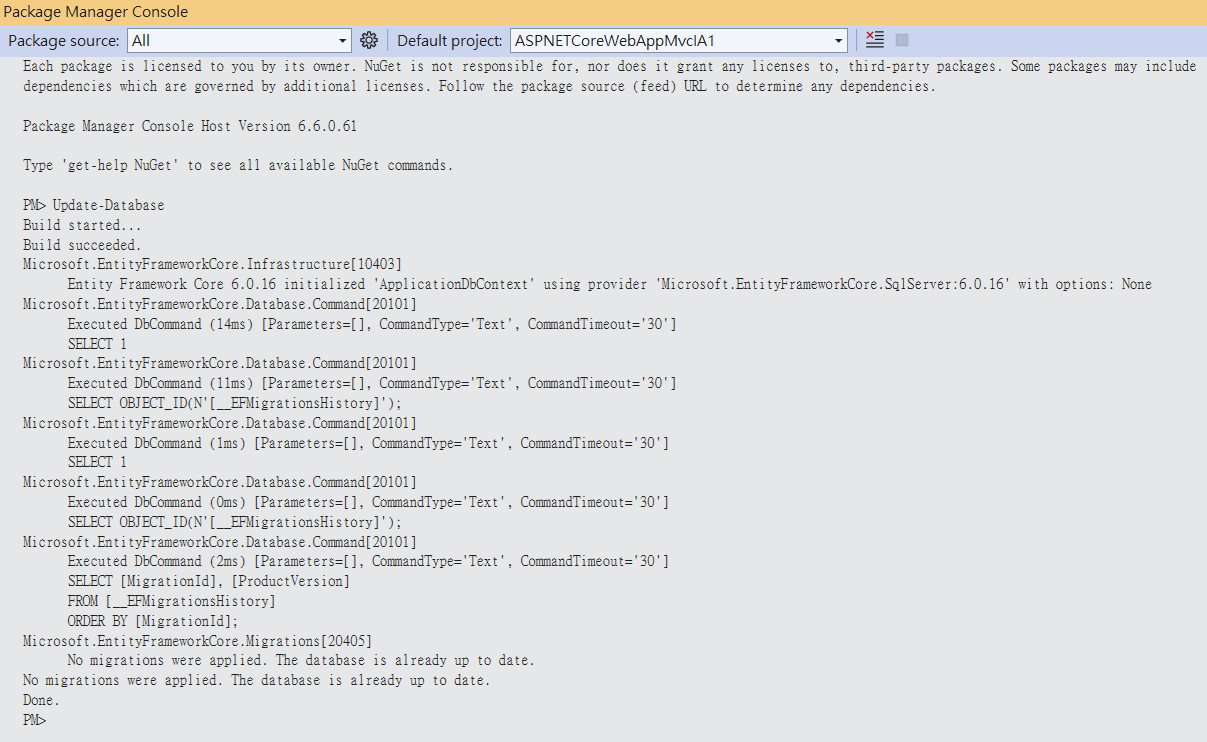
在 Visual Studio 2022 Package Manager Console 中執行指令 Update-Database, 就可以擁有權限, 順利完成.
或是在 Posershell 中執行指令 dotnet ef database update.
建立後的資料庫, 是存放在 %userprofile%\aspnet-專案名稱*.* 中.
或是在 Posershell 中執行指令 dotnet ef database update.
建立後的資料庫, 是存放在 %userprofile%\aspnet-專案名稱*.* 中.
完成 Database Migrations 後, 再到註冊使用者的 Register 畫面中, 輸入帳號: test@test.com, 密碼: Test@Test.123 註冊新使用者.
若註冊成功後, 就可以看到畫面 Register confimation 畫面.
由於這只是個網站樣板, 因此確認註冊的程序, 就只是按畫面上的連結( Click here to confirm your account), 就代表確認了.
若註冊成功後, 就可以看到畫面 Register confimation 畫面.
由於這只是個網站樣板, 因此確認註冊的程序, 就只是按畫面上的連結( Click here to confirm your account), 就代表確認了.

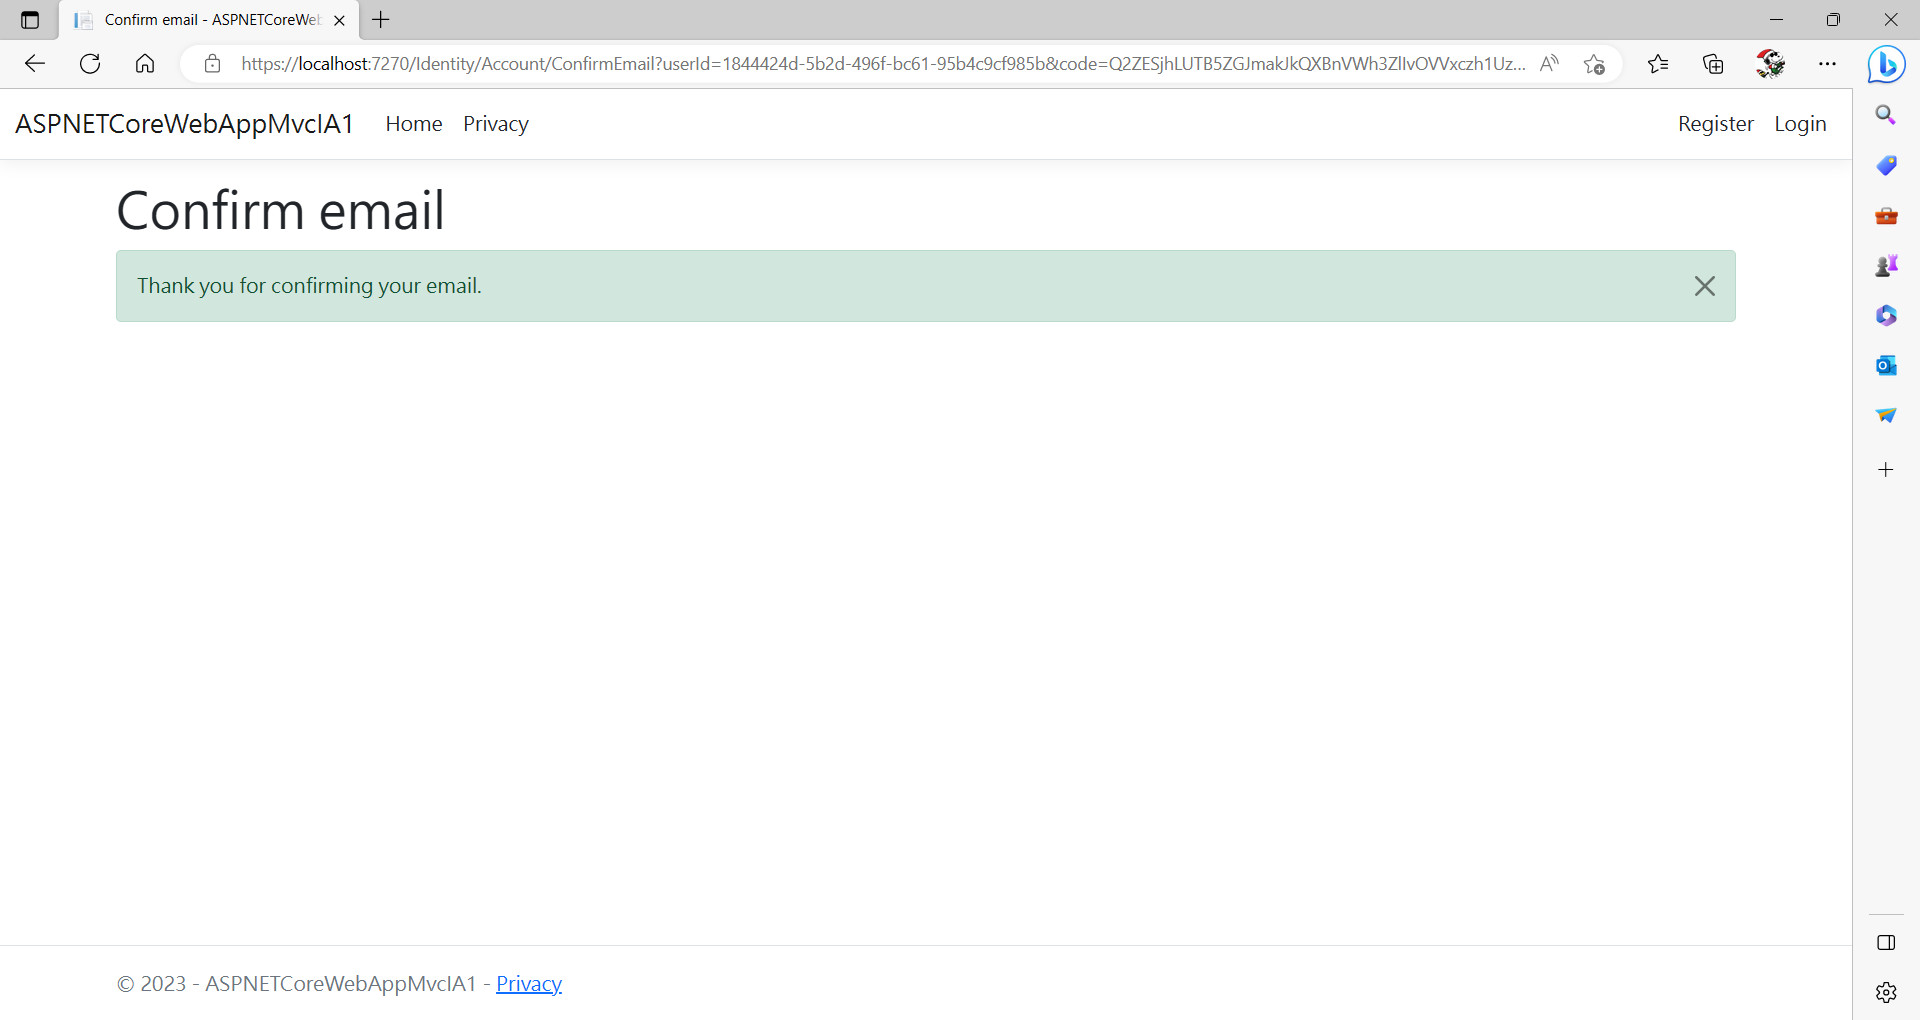
在 Register confirmation 畫面上, 按畫面上的連結( Click here to confirm your account)後, 出現 Confirm email 就代表使用者 test@test.com 已經註冊成功, 存入資料庫中了.
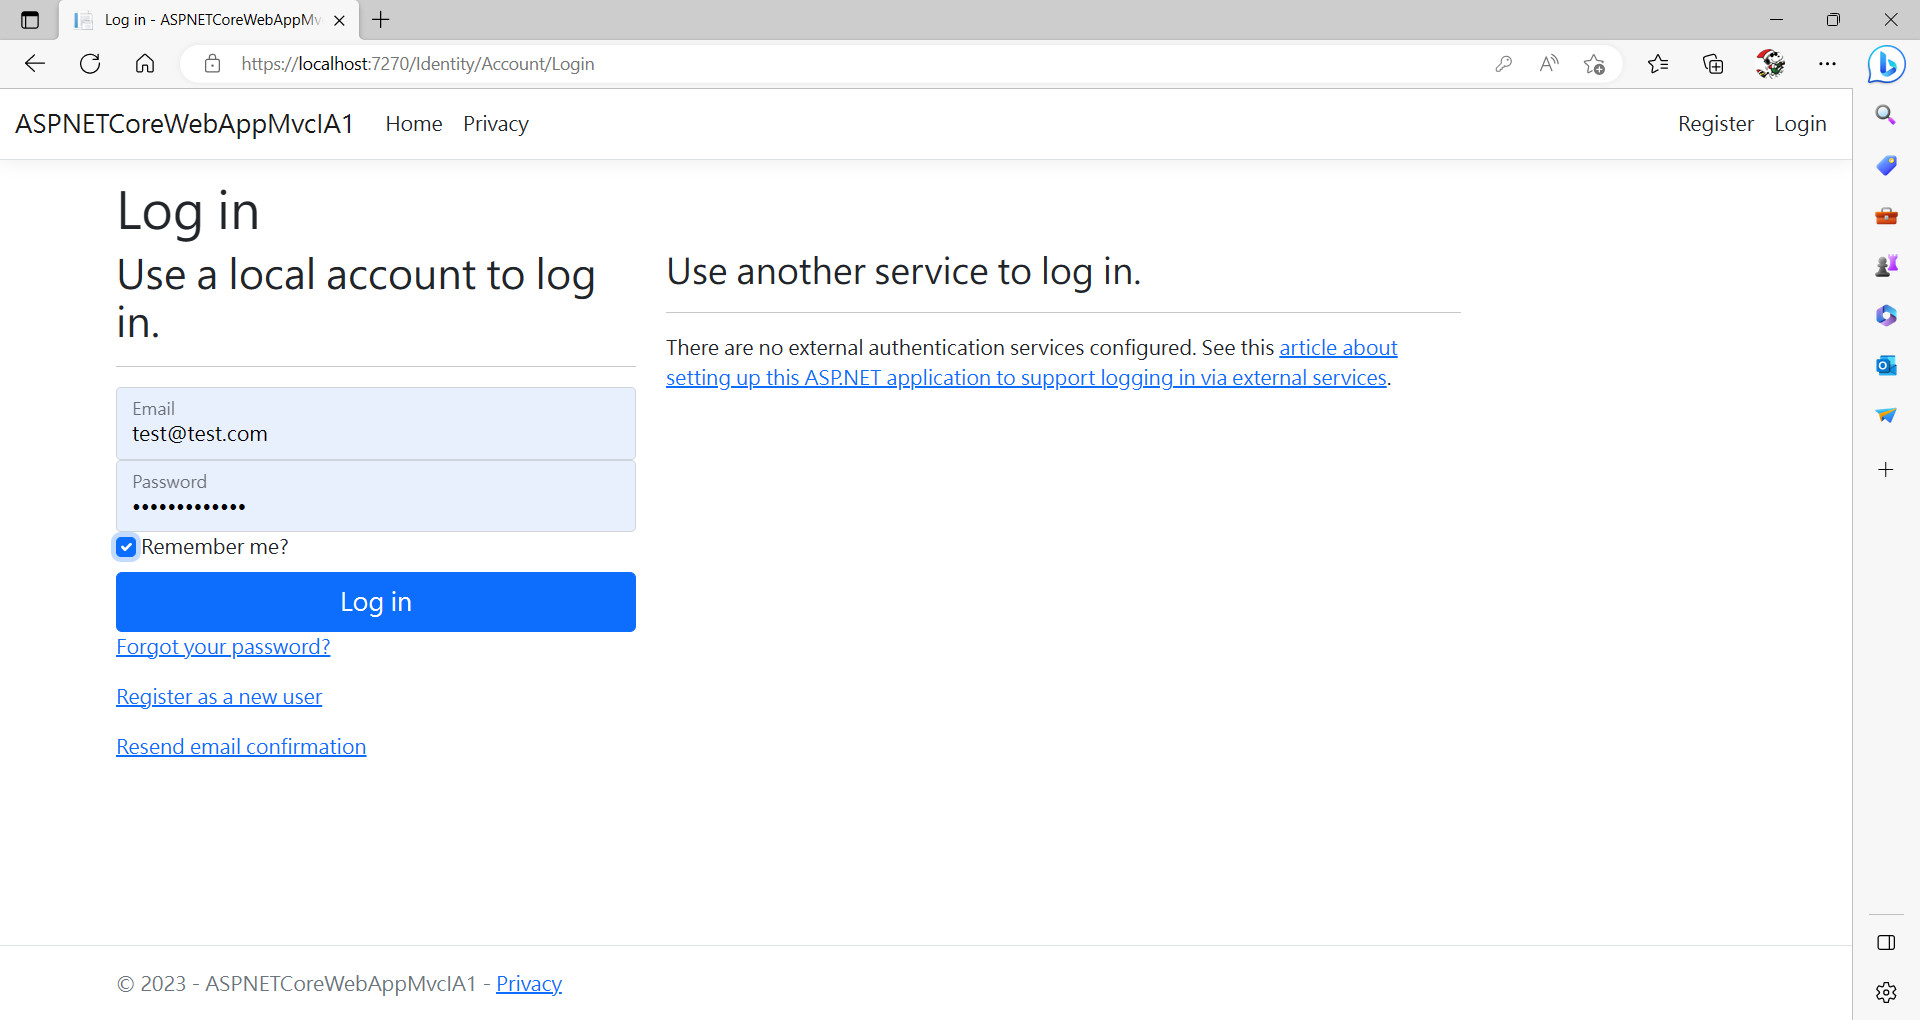
若重新登入網站, 則可使用先前已經註冊的帳號: test@test.com, 密碼: Test@Test.123 登入.
首頁右上方, 若已登入, 則會顯示目前登入的使用者名稱.

首頁右上方, 若未登入, 會顯示 Register 可註冊新會員.